175M+ ethically sourced IPs built for the highest reliability.
High-speed, cost-effective proxies built for any scraping workload.
Premium static residential proxies from trusted ASNs for most difficult targets.
Dedicated IPs from premium ASNs for demanding scraping.

AI-powered proxy solution for optimized web scraping performance.

20M+ IP addresses from real mobile devices for precise targeting.

Free Chrome proxy manager extension that works with any proxy provider.

Free Android proxy manager app that works with any proxy provider.

Free community-driven tools to improve your web scraping projects.
Web Scraper API
All-in-one web data collection platform for every stage of web scraping.
Fast Search API
Ultra-fast organic search results scraper tailored for AI workflows.
Headless Browser
Advanced browser automation solution for AI agents and scraping.
AI Studio
A suite of AI-powered tools for various scraping projects.

Documentation
All features, parameters, and integration details, backed by code samples in every coding language.
Tutorials, samples, and guides.
Latest fixes and features.


Zapier Integration With Web Scraper API
Zapier lets you automate workflows by connecting various applications and services without writing any code. It provides a visual framework where you can build complex workflows, databases, interfaces, chatbots, and AI-powered agents.
Oxylabs Web Scraper API is available in Zapier, offering actions for scraping Google search results, Amazon search and product data, and other websites. While you can use the Oxylabs module throughout Zapier's ecosystem, this tutorial focuses on using Zapier's Agents feature to build a deep research agent.

Prerequisites
Zapier account
Web Scraper API (free trial available via the dashboard)
1. Create an agent

After setting up your Zapier account, navigate to the Agents page from Zapier’s homepage. Click Create agent, then select Skip this step to access the agent setup screen directly. Name your agent (for example, "Deep Research Agent") and paste these ready-made instructions:
Your goal is to deeply research a specific topic and provide a comprehensive report with all your findings. You must thoroughly follow each step below:

1. Scrape Results:
- After the user provides a topic, create at least 3-5 distinct and relevant Google search queries that are short.
- For each search term you generated, use them to [INSERT Oxylabs: Search on Google HERE] of at least the first 3 pages.

2. Source Trustworthiness:
- Pick a minimum of 5-10 URLs that are unique, non-duplicate, and from the most trusted sources.
- Prioritize sources from reputable organizations, academic institutions, government sites, or well-known industry leaders.
- Exclude forums, user-generated content, or low-authority blogs unless otherwise specified.

3. Scrape Content:
- Collect content from each URL you've filtered in the previous step. [INSERT Visit website HERE] or, if web browsing failed, then [INSERT Oxylabs: Scrape Any Url HERE]
- If you're unable to scrape the URL, enable JavaScript rendering, use a "desktop" or "mobile" User-Agent, and set the geo-location to a country name, for instance, "United States" or other country.

4. Analysis:
- Read and extract key points from each source.
- Note any consensus, disagreements, and unique insights.
- [INSERT Google Docs: Create Document From Text HERE] and provide a comprehensive deep research report.
- List all source URLs and briefly describe the credibility of each.
Notice the placeholder text in brackets, for example, [INSERT Oxylabs: Search on Google HERE]. These mark where you have to insert specific Zapier tools, as shown in the next steps.
2. Insert tools
2.1 Oxylabs: Search on Google
This tool scrapes multiple result pages in a single action while enabling geolocation settings if you need to localize results for specific regions.

Select Insert tools → Add tools and search for “Oxylabs”. From the four available Oxylabs tools, pick the Search on Google tool. Then, click the blue Connect button and enter your Web Scraper API username and password on the newly opened page. Use the same credentials you’ve created in the dashboard:

Next, configure how the agent should use this tool by setting the following parameters:
Query: Let your agent generate a value for this field
Parse: True
Pages: Let your agent generate a value for this field
All other parameters: Do not include a value for this field

2.2 Visit website
In the third instruction step, add the Visit website tool:

2.3 Oxylabs: Scrape Any Url
The built-in “Visit website” tool sometimes fails against anti-scraping measures and doesn’t gather any data. When this happens, Oxylabs provides a reliable fallback. Follow the same process from step 2.1 to insert the Oxylabs: Scrape Any Url tool:

Click the tool's cog wheel and configure these settings:
Parse: Use default: False
Content Encoding: Do not include a value for this field
All other parameters: Let your agent generate a value for this field

2.4 Google Docs: Create Document From Text
In the 4th instruction step, let the agent create a Google Doc containing the analysis report. Go to Insert tools → Add tools → Google Docs → Create Document From Text.
Connect Zapier to your Google Account in a few simple steps, and then use these configuration settings:
Export Formats: DOCX
All other parameters: Let your agent generate a value for this field
By now, your instructions should look as follows:

3. Add a trigger
Make sure to add a trigger to be able to execute your agent. Simply select the On demand trigger:

4. Test and deploy the agent
Your agent might not follow instructions perfectly on the first try. Test it thoroughly, identify issues, and refine the instructions as needed. For example, you can append this additional requirement at the bottom of your current instructions:
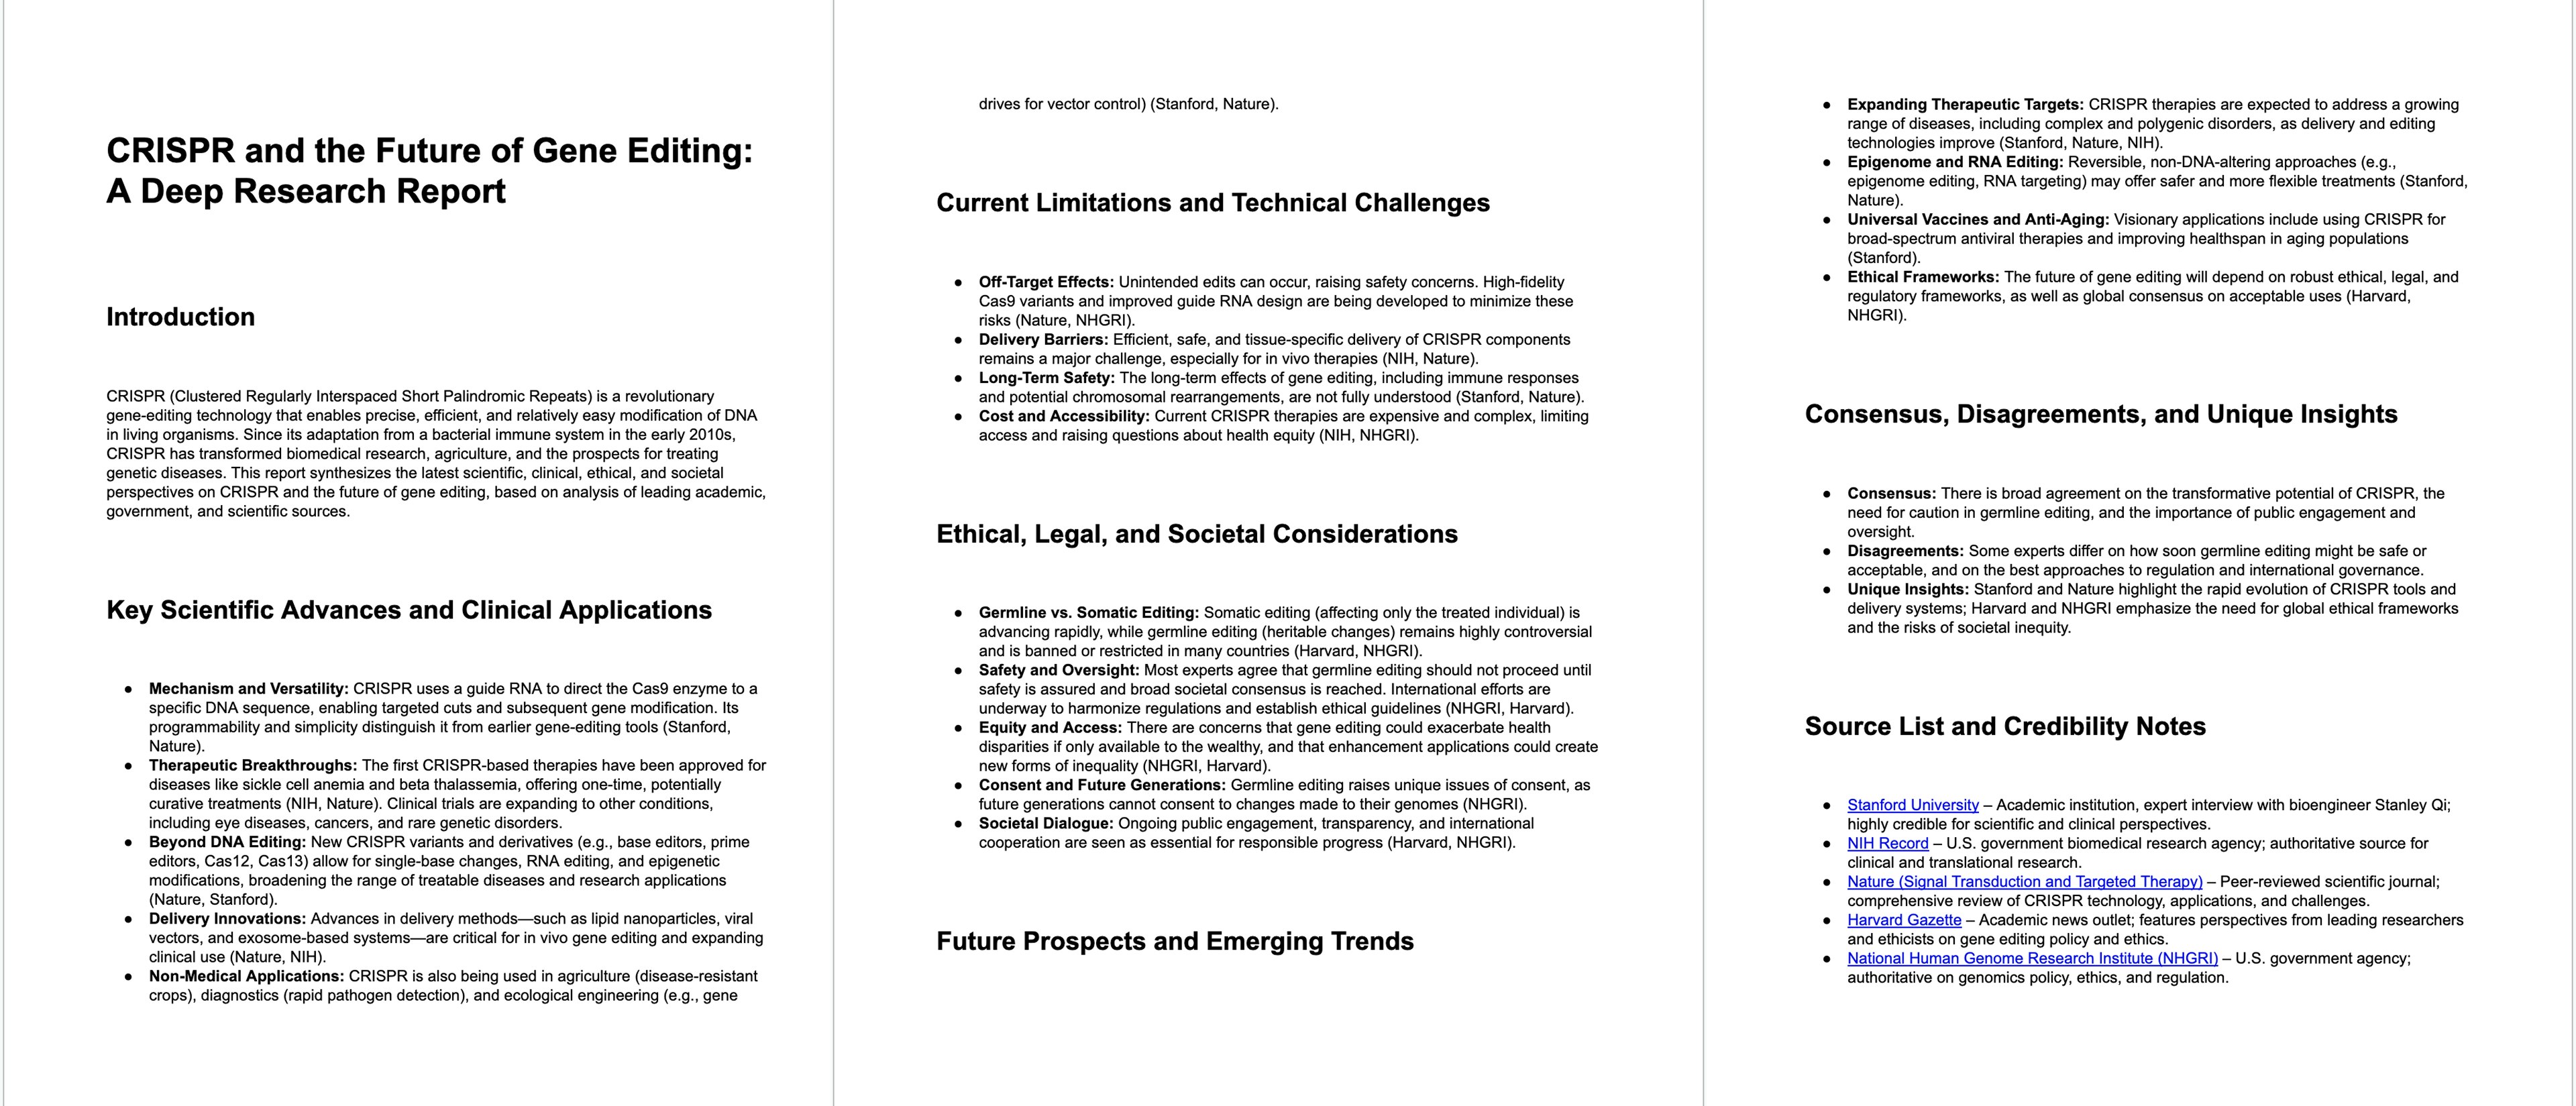
YOU MUST follow each instruction and confirm all requirements are met (e.g., number of search terms to generate, number of URLs to scrape).After thorough testing, navigate to the Activity tab, where you can run the agent without approving each step. Try testing with a topic like "CRISPR and the future of gene editing". Your agent should deliver a comprehensive report similar to this:
Wrap up
The Oxylabs integration connects directly with 8,000+ apps available in Zapier, meaning you can pipe real-time web data straight into your favorite apps and AI tools. The major benefit of the Oxylabs integration is the robust scraping infrastructure that overcomes common hurdles like IP blocks, CAPTCHAs, and JavaScript rendering.
While we've explored research report generation, you can also power price tracking workflows, news aggregation, market intelligence gathering, and many more use cases. If you have questions about Oxylabs solutions, don’t hesitate to reach us via live chat or email.
Please be aware that this is a third-party tool not owned or controlled by Oxylabs. Each third-party provider is responsible for its own software and services. Consequently, Oxylabs will have no liability or responsibility to you regarding those services. Please carefully review the third party's policies and practices and/or conduct due diligence before accessing or using third-party services.
Useful resources
Make.com Integration With Web Scraper API
Learn to connect Oxylabs scraper in Make with visual steps for web scraping, Google Sheets integration, and AI analysis.
Web Scraping With LangChain & Oxylabs API
Follow our quick guide on combining LangChain with Web Scraper API for hassle-free web scraping process and AI-driven analysis.
OpenAI Agents SDK Integration With Oxylabs Web Scraper API
Learn how to build AI agents that scrape and analyze web content by combining OpenAI's Agents SDK with Oxylabs Web Scraper API for cost-effective web access.

Get the latest news from data gathering world
Get Web Scraper API for $1.35/1K results
Proxies
Advanced proxy solutions
Data Collection
Datasets
Resources
Innovation hub