175M+ ethically sourced IPs built for the highest reliability.
High-speed, cost-effective proxies built for any scraping workload.
Premium static residential proxies from trusted ASNs for most difficult targets.
Dedicated IPs from premium ASNs for demanding scraping.

AI-powered proxy solution for optimized web scraping performance.

20M+ IP addresses from real mobile devices for precise targeting.

Free Chrome proxy manager extension that works with any proxy provider.

Free Android proxy manager app that works with any proxy provider.

Free community-driven tools to improve your web scraping projects.
Web Scraper API
All-in-one web data collection platform for every stage of web scraping.
Fast Search API
Ultra-fast organic search results scraper tailored for AI workflows.
Headless Browser
Advanced browser automation solution for AI agents and scraping.
AI Studio
A suite of AI-powered tools for various scraping projects.

Documentation
All features, parameters, and integration details, backed by code samples in every coding language.
Tutorials, samples, and guides.
Latest fixes and features.


![]() AI Summary:
AI Summary:
Jupyter Notebook is an open-source, web-based interactive computing environment that integrates live code, explanatory text, and visualizations into a single document. It utilizes language-specific kernels to execute code and display results immediately, facilitating data analysis, code documentation, and sharing across over 100 programming languages.
Jupyter Notebook is an open-source web-based interactive computing environment with which you can create and send documents containing code, text, equations, graphs, and more. The notebook application allows you to write code, view it, and execute it within a single user interface, thus making it easy to make changes on the go and immediately see the outcome. Simply put, it's an environment that facilitates literate programming.
Jupyter Notebooks use a notebook kernel to execute the code contained in the environment. In the beginning, the Jupyter Notebook supported the three main computational engines or Jupyter languages, namely Julia, Python, and R, making the word “Jupyter” somewhat of an acronym. Although by default, it deploys the IPython kernel that uses Python to execute code, it still supports over 100 programming languages (kernels), including Java, Python, R, MATLAB, SQL, Scala, Julia, and more.
This article discusses what Jupyter Notebook is, its uses, how to set it up on your computer, and whether it's ideal for beginners. Importantly, this article is essentially a tutorial on various aspects of the application, including using it for web scraping.

Jupyter Notebook was initially designed for use by data scientists
What is Jupyter Notebook used for?
It's used for a number of operations, including:
Data visualization: Jupyter Notebook was initially designed for use by data scientists, meaning the data analysis and interpretation is at the center of its operations. For this reason, you can use this application to generate charts and graphs from code using available modules such as Bokeh, Plotly, and Matplotlib. Notably, Jupyter Notebook is structured in such a way that it generates charts immediately below the code that created them.
Multimedia support: As a web application, Jupyter Notebook supports multimedia. There are two approaches to including multimedia on your notebooks, namely generating them using a module called IPython.display (this entails writing code) or including the multimedia as an HTML document.
Web scraping: Web scraping refers to the automated extraction of data from websites. As we'll detail later, Jupyter Notebook comes in handy and even creates a complete independent ecosystem. Python scraping offers a viable approach as well.
Code sharing: Jupyter Notebook is somewhat comparable to cloud services like Pastebin and GitHub, which facilitate code sharing. However, Jupyter Notebooks also promote interactivity in that you can create code, execute it, view the results, and include text-based comments, all using your web browser. You can then save the file and send it to anyone with whom you are collaborating.
Documenting code: As we detailed earlier, writing quality code entails making it easy to read and understand the context within which you created the code. Being an application meant to promote collaboration, it goes without saying that Jupyter Notebook should have tools that facilitate this very function; and it does. The Jupyter Notebook environment on this open-source application enables you to explain your code line-by-line, thus making it easy for anyone to understand your reasoning.
Setting up the Jupyter Notebook
Given that you can set up the Jupyter Notebook in various ways, this article explores one of them. Notably, we assume you’re using Python 3 and have already installed it on your computer. If not, you can download the latest version from the Python website. In this guide, we’ll be using the pip package installer, so if you haven’t installed it yet, you can visit the pip documentation for installation steps.
Installation
To install Jupyter Notebook, run Command Prompt (Windows user) or Terminal window (macOS user). Remember that the folder you select before running the command line will automatically be your home directory once you run the application. So, it’s advisable that you create a new folder to prevent Jupyter Notebook documents from cluttering the unintended folder.
Once your command line is up and running, type the following command pip install notebook and hit enter/return. This process should take under a minute to install Jupyter Notebook.
To run the notebook, simply type jupyter notebook in the command line, which should redirect you to your preferred browser and display the notebook dashboard through the http://localhost:8888/tree URL, as shown below. Files that appear there depend on the installation directory you chose in step 1.

Jupyter Notebook Homepage
We haven’t created a notebook document yet, as we’re only running the Jupyter Notebook server. Remember to keep the Command Prompt or Terminal window running; otherwise, you won’t be able to access the notebook. So, let’s create a notebook document.
Creating a notebook
To create a new notebook, click New on the top right side of the page and select Python 3 from the dropdown menu, as seen below. Additionally, Jupyter Notebooks allow you to create text files and folders and even run a Terminal in the browser.
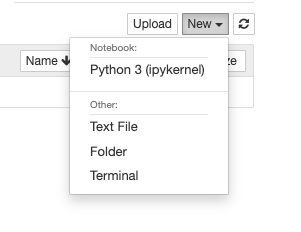
Dropdown menu for creating new Jupyter Notebook
Your notebook will open in a new browser tab. Then, you can name it by clicking the “Untitled” field next to the Jupyter logo.

Renaming the notebook
How to use Jupyter Notebook?
Cell types
After creating a new folder and, subsequently, a new notebook, it’s time to start using Jupyter Notebook. But how do you use it, and how is a notebook structured? Much like Microsoft Excel, Jupyter Notebooks are composed of cells, i.e., boxes that allow you to input lines of code or text, as shown in the image below:

An empty code cell
Jupyter Notebook has four types of cells: Code, Markdown, Raw NBConvert, and Heading. The Heading type is no longer supported; thus, you must use Markdown to create headings.
Code cells are where you input your code lines. Note, that the programming language code cells use depend on the kernel. As mentioned before, the default kernel in use is IPython, which executes python code.
The Markdown type uses the syntax of a Markdown markup language, which is a more straightforward markup language compared to Rich Text Format (RTF) or HyperText Markup Language (HTML). It allows you to format text in bold, italic, and inline code, as well as add headers, make numbered and bulleted lists, and much more.
The Raw NBConvert type allows you to specify content in a cell to be unmodified in the nbconvert output. The output will be rendered in HTML and LaTeX formats. If you would like to learn more, check out this informative Sphinx documentation.
Using cells
Since we’re running a Python 3 kernel, we can write Python code in the cells. Let’s run a test code by entering the following command:
print('Hello World!')To run it, you can click the Run button just above the cell or simply press Shift + Enter on your keyboard. The output will appear below the initial cell, as you can see here:

Code cell output
Once you run a cell, the square brackets next to the word In within the cell will fill with a certain number. It represents the order in which you run the code cells. As you can see from the above example, the first cell we ran is marked with the number 1.
It’s favorable to use shortcuts to speed up the programming process in the notebook. To quickly insert a cell, first select a cell and press A on your keyboard to add a cell above the selected one or press B to insert it below.
To select multiple cells, first select the cell you wish to include, then hold down the Shift key on your keyboard, and select a second cell you want to include. With this method, you’ll select multiple cells that sit between the first and the second cell you chose.
If you wish to delete certain cells, you can do so by selecting the cell and double-pressing D on your keyboard. Press the Z key to undo any changes.
Using Markdown
In this section, we’ll review the essential commands to style the text using Markdown. To turn a cell into a Markdown type, navigate to the dropdown menu displaying the word Code, as seen below:

Choosing a cell type
Then, from the dropdown menu, select Markdown. Alternatively, you can select cells and press M on your keyboard to turn them into Markdown cells. You can press Y to turn the cells back into code cells.
Text emphasis
You can give more emphasis to your text by making it bold. In your Markdown cell, use double underscore (_) or asterisk (*) symbols:

The output should look like this:

Similarly, to make text italic, use a single underscore (_) or asterisk (*) symbol:

You can also highlight the text with inline code by wrapping the text in single backticks (`) as seen below:

As you can see, the output presents us a highlighted inline code:

Headers
To create a header in Jupyter Notebook, before entering the text, use the number sign (#) with a space after it:

The amount of number signs determines the size and style of a header. You can use up to six number signs, but the header size and style won’t change when you use six number signs compared to five number signs. The output should look like this:

Useful tip: If you press the number 1 key on your keyboard when the Markdown cell is selected, you’ll get a Header 1. The numbers 2, 3, 4, 5, and 6 on a keyboard provide different headers accordingly.
You can open up a list of keyboard shortcuts available in the Jupyter Notebook by pressing the keyboard icon found on the right of the cell type dropdown menu. Alternatively, you can press Ctrl + Shift + P (Windows) or Cmd + Shift + P (macOS) to open a list of available shortcuts:

A list of shortcuts
Lists
You can create bulleted lists by using single asterisks (*), dashes (-), or plus signs (+). To create a sub-list, enter a double space before a bullet, as seen below:

Once you run it, the cell should return such output:

To make a numbered list, enter 1. before each entry, as shown below:

The output should look like this:

Since Jupyter Notebooks use Markdown, you can utilize most of the commands from the Markdown language. Follow this link to find a more detailed list of possible Markdown commands.
Downloading the notebook
In Jupyter Notebook, you can export your notebook to various formats by navigating to File > Download as. In the image below, you can see all the currently available output formats:

Exporting through nbconvert
If you wish to export notebooks using a command-line tool, you’ll have to install additional tools and packages, such as Pandoc, Tex, and Pyppeteer. For installation steps, you can follow this comprehensive nbconvert guide. What’s great about this method is that you can export multiple notebook files simultaneously. But before exporting anything in the terminal, make sure to choose the notebook document folder as your home directory.
So, using the following code example, we’ll export three different notebook documents, namely Project1, Project2, and Project3, to a web PDF format. To convert notebooks to a web PDF format, you’ll need to have Pyppeteer installed. Additionally, you’ll have to pass --allow-chromium-download in the command-line when using Pyppeteer for the first time:
jupyter nbconvert --to webpdf Project1.ipynb Project2.ipynb Project3.ipynb --allow-chromium-downloadAlternatively, we can export all three files by typing in Project*.ipynb instead of specifying all three notebook documents separately.
jupyter nbconvert --to webpdf Project*.ipynb --allow-chromium-downloadAs mentioned previously, you can use nbconvert as a library with various programming languages. If you would like to use it as a library in Python, check out the use examples from the official nbconvert webpage.
Extensions
Jupyter Notebooks also support extensions, allowing you to do more. There’s a handy Python package called jupyter_contrib_nbextensions that contains an up-to-date list of Jupyter Notebook extensions. Note that this is a collection of community-contributed extensions and isn’t officially related to the creators of the Jupyter Notebook. If you’re interested to learn more, check out their website and GitHub repository.
Jupyter Notebook and web scraping
Successful web scraping is a multi-step process that entails retrieving HTML data from the public portion of the target website, parsing it to obtain only the desired information, and, lastly, storing this information in a file. Web scraping with Jupyter Notebooks follows a similar process, but successful completion relies on the various Python libraries.
For this reason, you have to use modules such as urllib.request to fetch websites’ Uniform Resource Locators (URLs) and a combination of the Beautiful Soup package and lxml scraping library to parse/process the HTML data.
The latter combination ensures that you can harness the benefits of both Beautiful Soup and lxml. For instance, Beautiful Soup fixes bad HTML, presenting the data as Python data, while lxml is a fast and powerful HTML processing library.
Next, the parsed data needs to be converted into a structured format, such as a table with rows and columns, through a multistep process that begins with removing HTML tags from the text using Beautiful Soup. Thereafter, you need to create an empty list and then attach each row of text to the newly created empty list. Next, convert the list into a data frame using two Python libraries, namely Pandas and NumPy, and subsequently, save the data as a .csv file.
Notably, in Jupyter Notebook, the result of each line, block, or paragraph is visible after running it and doesn't disappear with the run of the following line, block, or paragraph.
Is Jupyter Notebook good for web scraping beginners?
As a tool that supports explanatory text, coding, code execution, and visualization of the output, Jupyter Notebook is a handy tool for beginners. The fact that it enables the user to see everything provides an environment that promotes experimentation and the ability to try out different codes, as well as running code cells independently. These functional elements make Jupyter Notebooks extremely useful for beginners as it builds on their knowledge and promotes digital literacy.

Jupyter Notebook is a handy tool for beginners
What is a Jupyter Notebook not suitable for?
While the Jupyter Notebook is perfect for novices and beginners, it's usually a struggle for seasoned developers and data scientists. Its deficiencies also trickle down to its various use cases.
While we have mentioned that it promotes collaboration, it only does so in a limited capacity. By that, we mean that you have to save the notebook document and send it to another developer. Further, two people cannot work on the same notebook simultaneously. If two individuals are inputting code at the same time, Jupyter Notebooks cannot successfully merge the codes.
Secondly, you cannot conduct unit testing on Jupyter Notebook. This means that it's nearly impossible to find bugs within a few lines of code. Testing code on this platform requires you to wrap up the entire code and then run the test. Even so, successful execution is not guaranteed as it may fail halfway due to errors within the code cells.
If we delve deeper, specifically into web scraping, the notebook should only be used to extract small volumes of data, practice, or code testing purposes.
Jupyter Notebook displays the results of each line, block, or paragraph. When scraping on a large scale, there are many results, meaning that it can slow down the whole web scraping process. The larger the scale of web scraping, the more important efficiency is. Running optimized code would make much more sense once the initial discovery phase has been completed in Jupyter. Though it's quite likely that such code won't work with it, and you would have to stop using Jupyter at this point.
A larger web scraping project also requires more developers to work with it. As mentioned above, two or more developers cannot work on the same notebook simultaneously. Instead, developers have to save the notebook files and send them to another developer. This process seems inefficient, so using Jupyter Notebooks for large-scale web scraping projects isn't worth the effort.
Conclusion
Jupyter Notebook is a proven and useful tool for creating a notebook environment wherein you can include comments, code, execute the code, and also see the outcome of the written code within the same platform. These features make the notebook interactive, an attribute that makes it a valuable tool for beginners. It also facilitates collaboration but to a limited extent. While Jupyter Notebooks can be used in web scraping, it's only recommended for small-scale projects.
Frequently asked questions
What Is Markdown In Jupyter Notebook?
Markdown is a type of cell that uses Markdown language to style the text. It’s a simpler language compared to Rich Text Format (RTF) or HyperText Markup Language (HTML).
With Markdown cells, you can use Markup tags to format text in bold and italic, highlight text, create headers, numbered and bulleted lists, tables, add pictures, and more.
What Language Is Jupyter Notebook Written In?
What Is Save And Checkpoint In Jupyter Notebook?
What Is Jupyter Notebook File Extension?
What Is The Difference Between Jupyter Notebook And JupyterLab?
About the author

Iveta Liupševičė
Head of Content & Research
Iveta Liupševičė is a Head of Content & Research at Oxylabs. Growing up as a writer and a challenge seeker, she decided to welcome herself to the tech-side, and instantly became interested in this field. When she is not at work, you'll probably find her just chillin' while listening to her favorite music or playing board games with friends.
All information on Oxylabs Blog is provided on an "as is" basis and for informational purposes only. We make no representation and disclaim all liability with respect to your use of any information contained on Oxylabs Blog or any third-party websites that may be linked therein. Before engaging in scraping activities of any kind you should consult your legal advisors and carefully read the particular website's terms of service or receive a scraping license.
Related articles

Cheerio vs. Puppeteer: Which Should You Use for Web Scraping?

Shinthiya Nowsain Promi
2026-06-23


List Crawling in Python: Tools, Tips, and Techniques

Danielė Virinaitė
2026-06-17
Boost your web scraping
Let's discuss how Oxylabs can help you optimize your scraping operations by providing dedicated tools.

Get the latest news from data gathering world
Scale up your business with Oxylabs®
Proxies
Advanced proxy solutions
Data Collection
Datasets
Resources
Innovation hub
Boost your web scraping
Let's discuss how Oxylabs can help you optimize your scraping operations by providing dedicated tools.