175M+ ethically sourced IPs built for the highest reliability.
High-speed, cost-effective proxies built for any scraping workload.
Premium static residential proxies from trusted ASNs for most difficult targets.
Dedicated IPs from premium ASNs for demanding scraping.

AI-powered proxy solution for optimized web scraping performance.

20M+ IP addresses from real mobile devices for precise targeting.

Free Chrome proxy manager extension that works with any proxy provider.

Free Android proxy manager app that works with any proxy provider.

Free community-driven tools to improve your web scraping projects.
Web Scraper API
All-in-one web data collection platform for every stage of web scraping.
Fast Search API
Ultra-fast organic search results scraper tailored for AI workflows.
Headless Browser
Advanced browser automation solution for AI agents and scraping.
AI Studio
A suite of AI-powered tools for various scraping projects.

Documentation
All features, parameters, and integration details, backed by code samples in every coding language.
Tutorials, samples, and guides.
Latest fixes and features.


![]() AI Summary:
AI Summary:
This guide explains how to scrape images from a website using Python. It details the process of extracting image URLs with Beautiful Soup and Selenium, then downloading and saving the image content locally. The process also covers handling potential 403 Forbidden errors.
Previously, we outlined how to scrape text-based data with Python. We‘ve showcased the entire process: from installing Python and the required libraries to coding a basic web scraper and outputting the acquired data into a CSV file. If you're unfamiliar with web scraping or want to learn more, check out our article on what is web scraping and how to scrape data from a website. In this second installment, you’ll learn how to extract images from a website and store them in a desired location.
We highly recommend reading our article Python Web Scraping Tutorial: Step-By-Step, before moving forward. Understanding how to build a basic data extraction tool will make it significantly easier to create a Python image data scraper. Additionally, we’ll use parts of the code we had written previously as a foundation to download image links. Finally, we’ll use both Selenium and the requests library for learning purposes.
Before scraping images from a public website, please consult with legal professionals to be sure that you aren't breaching third-party rights, including but not limited to intellectual property rights.
1. Install the python image scraping libraries
There are quite a few libraries you can utilize to extract pictures and visual content from a website. In the basic web scraper tutorial, we used Beautiful Soup, Selenium, and pandas to gather and output data into a CSV file. You'll follow all these previous steps to export image URLs as well.
Of course, web scraping image URLs into a list isn’t enough. You’ll need to use several other packages to store the content of the URL into a variable, convert it into an image object, and then save it to a specified location. The Pillow and requests libraries will do this job.
If you missed the previous tutorial, open your terminal and install the following:
pip install beautifulsoup4 selenium pandas pyarrow Pillow requestsThe Pillow library will process the images, and the requests library will send HTTP requests. Additionally, the PyArrow library is required as a dependency for pandas.
Additionally, we’ll use built-in Python packages, such as io, pathlib, and hashlib, to download images from a website and store them in a specified folder.
2. Inspect the web page and locate image elements
For demonstration, we'll use eBay’s product listing page with the search keyword “laptop”. Here’s what the listing page, along with the HTML source, looks like in the browser:

Notice each image in the page's HTML source is enclosed in a div element with a class image-treatment. Furthermore, the images are within the img tags with a source URL in the src attribute.
3. Launch Selenium WebDriver to open target URL
import pandas as pd
from bs4 import BeautifulSoup
from selenium import webdriver


driver = webdriver.Chrome()
driver.get("https://www.ebay.com/sch/i.html?_from=R40&_trksid=p2334524.m570.l1313&_nkw=laptop&_sacat=0&LH_TitleDesc=0&_osacat=0&_odkw=laptop")
results = []
content = driver.page_source
soup = BeautifulSoup(content, "html.parser")
The data extraction process begins almost exactly the same – you have to import the Python packages as needed. Then, specify your preferred browser for WebDriver, select the URL from which to scrape image links, and create a list to store them. After the Chrome driver opens the URL, the content variable points to the page source, and then the Beautiful Soup library makes the data ready for parsing.
Run Selenium in headless browser mode
Currently, the code runs the driver in a headful mode. You can run it without a GUI by specifying the headless browser mode:
from selenium.webdriver import ChromeOptions

options = ChromeOptions()
options.add_argument("--headless=new")
driver = webdriver.Chrome(options=options)
Set a custom ChromeDriver path
If you have stored the executable browser driver in a custom location, you should specify the directory by creating a ChromeService instance with the path to your driver and passing it to the webdriver instance as a service:
service = webdriver.ChromeService(executable_path='/path/to/driver')
driver = webdriver.Chrome(service=service)
4. Extract image URLs with the Beautiful Soup library
In the previous tutorial, we performed all actions by using built-in and defined functions. While we could do another tutorial without defining any functions, it’s an extremely useful tool for just about any project:
# An example of how to define a function
# and select custom arguments for the code inside the function.
def function_name(arguments):
    # Function body goes here.
So let’s move our URL scraper into a defined function. We’ll reuse the same code used in the Python Web Scraping Tutorial: Step-by-Step article and repurpose it to extract full URLs:
Before
for a in soup.findAll(attrs={'class': 'class'}):
    name = a.find('a')
    if name not in results:
        results.append(name.text)
After
# Picking a name that represents the function will be useful as you expand your code.
def parse_image_urls(classes, location, source):
    for a in soup.findAll(attrs={'class': classes}):
        name = a.find(location)
        if name not in results:
            results.append(name.get(source))
Note that it now appends in a different manner. Instead of appending the text, the code uses another function, get(), and adds a new parameter source to it. The source parameter indicates the field on the website where image links are stored. In our case, the image links are in the src HTML tag.
From the previous section, we know the classes, locations, and sources of the images we want to extract. Thereby, you can call your newly defined function as such:
parse_image_urls("image-treatment", "img", "src")Your code should now look something like this example:
import pandas as pd
from bs4 import BeautifulSoup
from selenium import webdriver
from selenium.webdriver import ChromeOptions

options = ChromeOptions()
options.add_argument("--headless=new")
driver = webdriver.Chrome(options=options)

driver.get("https://www.ebay.com/sch/i.html?_from=R40&_trksid=p2334524.m570.l1313&_nkw=laptop&_sacat=0&LH_TitleDesc=0&_osacat=0&_odkw=laptop")
results = []
content = driver.page_source
soup = BeautifulSoup(content, "html.parser")


def parse_image_urls(classes, location, source):
    for a in soup.findAll(attrs={"class": classes}):
        name = a.find(location)
        if name not in results:
            results.append(name.get(source))


parse_image_urls("image-treatment", "img", "src")
5. Save image URLs to a CSV file
It’s extremely useful to export the data into a CSV file, so you can always easily check for any possible semantic errors. To achieve this, you can use the pandas library and add the following example lines to your code:
df = pd.DataFrame({"links": results})
df.to_csv("links.csv", index=False, encoding="utf-8")
If you run the code right now, you should get the links.csv file created right in the running directory. Here’s a partial snippet of the CSV file with the extracted image URLs:

6. Download and save images from the website
Assuming that you didn’t run into any issues in the previous section, you can continue with this section to download images from a website.
Fetch image content with the requests library
The requests library can be used to extract the content stored in the image URL. The below code example snippet achieves that with a for loop that iterates over the results list:
# Import the requests library to send HTTP requests
import requests
for b in results:
# Store the content from the URL to a variable
    image_content = requests.get(b).content
Next, use the io library to create a byte object out of image_content and store the data in a new variable:
# The io library manages file-related in/out operations.
import io
# Create a byte object out of image_content and store it in the variable image_file
image_file = io.BytesIO(image_content)
Convert bytes to an image with Pillow
So far, the above image_file is just a Python object. It has to be converted to an RGB image with the Python library called Pillow:
# Use Pillow to convert the Python object to an RGB image
from PIL import Image
image = Image.open(image_file).convert("RGB")
Save the Image as PNG to a Folder
The code is still not complete, as you need to find a place to store the image data. Let’s create a folder called “Test”:
# pathlib lets you point to specific directories. Use it to store the images in a folder.
from pathlib import Path
# hashlib allows you to get hashes. Let's use 'sha1' to name the images.
import hashlib
# Set a file_path variable that points to your directory.
# Create a file based on the sha1 hash of 'image_content'.
# Use .hexdigest to convert it into a string.
file_path = Path("/path/to/test", hashlib.sha1(image_content).hexdigest()[:10] + ".png")
image.save(file_path, "PNG")
Complete source code
Let’s combine all of the previous steps and see how it all works out. Note that the pandas library is grayed out in your code as it isn’t used in the code below. We kept it for the sake of convenience. Use it if you need to see or double-check the outputs.
import hashlib, io, requests, pandas as pd
from selenium import webdriver
from selenium.webdriver import ChromeOptions
from bs4 import BeautifulSoup
from pathlib import Path
from PIL import Image


options = ChromeOptions()
options.add_argument("--headless=new")
driver = webdriver.Chrome(options=options)

driver.get("https://www.ebay.com/sch/i.html?_from=R40&_trksid=p2334524.m570.l1313&_nkw=laptop&_sacat=0&LH_TitleDesc=0&_osacat=0&_odkw=laptop")
content = driver.page_source
soup = BeautifulSoup(content, "html.parser")
driver.quit()

def gets_url(classes, location, source):
    results = []
    for a in soup.findAll(attrs={"class": classes}):
        name = a.find(location)
        if name not in results:
            results.append(name.get(source))
    return results

if __name__ == "__main__":
    returned_results = gets_url("image-treatment", "img", "src")
    for b in returned_results:
        image_content = requests.get(b).content
        image_file = io.BytesIO(image_content)
        image = Image.open(image_file).convert("RGB")
        file_path = Path("/path/to/test", hashlib.sha1(image_content).hexdigest()[:10] + ".png")
        image.save(file_path, "PNG")
For efficiency, you should quit the WebDriver by using driver.quit() after retrieving the URL list. You no longer need the browser, as everything is stored locally.
Handle the 403 Forbidden error with a User Agent
Running the code can produce one of two results:
Images are outputted into the folder you’ve selected by defining the file_path variable;
Python outputs a 403 Forbidden Error.
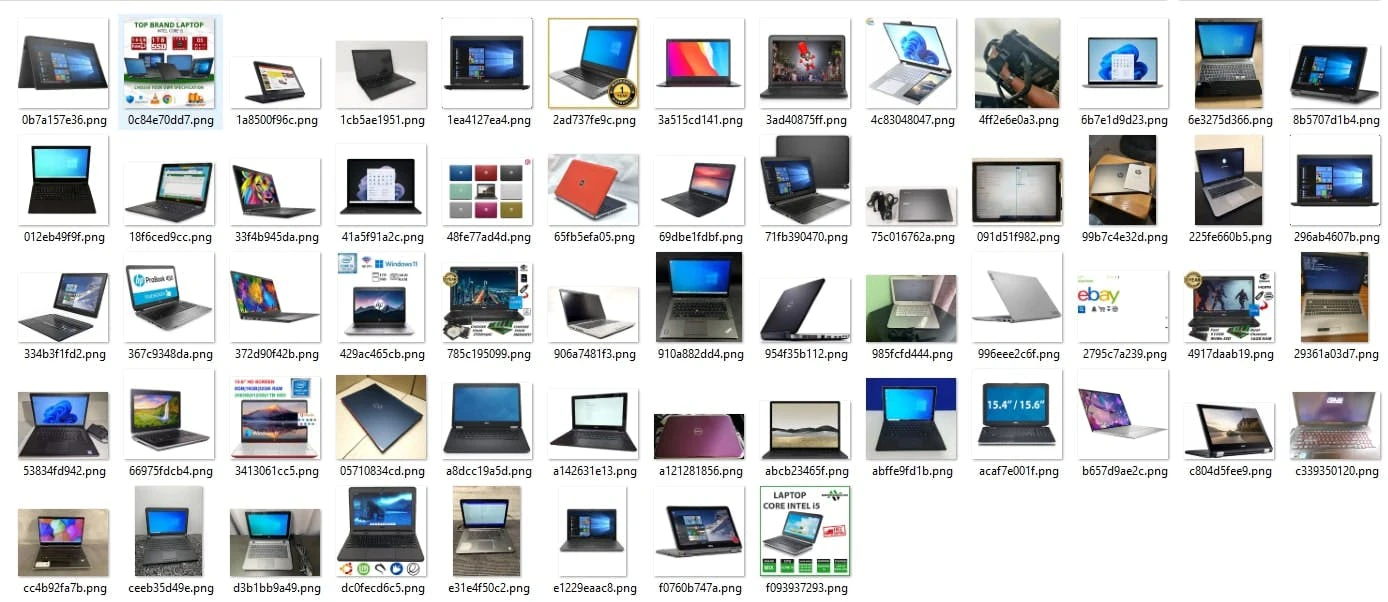
Obviously, getting the first result means your code worked as intended, and your image destination folder should look something like this:
You're likely to face the second scenario when web scraping a website that has strict access control measures since the 403 Forbidden Error means the target site has denied your request. Fixing the second outcome will take a little bit of time in most cases, although, at times, there can be more difficult scenarios.
Whenever you use the requests library to send a request to the destination server, a default user agent python-requests/version.number is assigned, for instance, python-requests/2.31.0. Some web services might hinder such web requests as this user agent points to the use of the requests library. Fortunately, the library allows you to assign any user agent (or an entire header) you want:
image_content = requests.get(b, headers={'User-agent': 'Mozilla/5.0 (Windows NT 10.0; Win64; x64) AppleWebKit/537.36 (KHTML, like Gecko) Chrome/113.0.0.0 Safari/537.36'}).contentAdding a user agent will be enough for most cases. There are more complex cases where servers might try to check other parts of the HTTP header in order to confirm that it’s a genuine user. Refer to our guides on HTTP headers and web scraping practices for more information on how to use them to extract images from websites online. We’ve also made an in-depth video tutorial specifically on how to handle the 403 Forbidden Error, so be sure to check it out below:

Clean up the code with defined functions
The image extraction is finished, but the code still looks messy. You can make your application more readable and reusable by putting everything under defined functions:
import hashlib, io, requests, pandas as pd
from selenium import webdriver
from selenium.webdriver import ChromeOptions
from bs4 import BeautifulSoup
from pathlib import Path
from PIL import Image


def get_content_from_url(url):
    options = ChromeOptions()
    options.add_argument("--headless=new")
    driver = webdriver.Chrome(options=options)

    driver.get(url)
    page_content = driver.page_source
    driver.quit()
    return page_content

def parse_image_urls(content, classes, location, source):
    soup = BeautifulSoup(content, "html.parser")
    results = []
    for a in soup.findAll(attrs={"class": classes}):
        name = a.find(location)
        if name not in results:
            results.append(name.get(source))
    return results

def save_urls_to_csv(image_urls):
    df = pd.DataFrame({"links": image_urls})
    df.to_csv("links.csv", index=False, encoding="utf-8")

def get_and_save_image_to_file(image_url, output_dir):
    image_content = requests.get(image_url).content
    image_file = io.BytesIO(image_content)
    image = Image.open(image_file).convert("RGB")
    filename = hashlib.sha1(image_content).hexdigest()[:10] + ".png"
    file_path = output_dir / filename
    image.save(file_path, "PNG")

def main():
    url = "https://www.ebay.com/sch/i.html?_from=R40&_trksid=p2334524.m570.l1313&_nkw=laptop&_sacat=0&LH_TitleDesc=0&_osacat=0&_odkw=laptop"
    content = get_content_from_url(url)
    image_urls = parse_image_urls(
        content=content, classes="image-treatment", location="img", source="src"
    )
    save_urls_to_csv(image_urls)

    for image_url in image_urls:
        get_and_save_image_to_file(
            image_url, output_dir=Path("/path/to/test")
        )

if __name__ == "__main__":
    main()
    print("Done!")
Everything is now nested under clearly defined functions and can be called when imported. Otherwise, it will run as it had previously.
How to scrape JavaScript pages and dynamically loaded images
Some web pages only add multiple images to the DOM after JavaScript rendered content finishes executing, or after the user scrolls. These are dynamically loaded images that a plain driver.get() call will miss. The simplest way to handle these is to add a short wait (and a scroll loop, if needed) inside get_content_from_url() before grabbing page_source:
from selenium.webdriver.common.by import By
from selenium.webdriver.support.ui import WebDriverWait
from selenium.webdriver.support import expected_conditions as EC

def get_content_from_url(url):
    options = ChromeOptions()
    options.add_argument("--headless=new")
    driver = webdriver.Chrome(options=options)

    driver.get(url)
    WebDriverWait(driver, 10).until(
        EC.presence_of_all_elements_located((By.CSS_SELECTOR, "img"))
    )
    driver.execute_script("window.scrollTo(0, document.body.scrollHeight);")
    page_content = driver.page_source
    driver.quit()
    return page_content
This is typically enough for a simpler webpage, but if images are still not displayed in your results, check whether they're lazy-loaded through the data-src attribute instead of src, and pass "data-src" as the source argument to parse_image_urls() instead.
Scraping CSS background images and SVG elements
Not every picture sits in an img tag, as some are used as CSS background images and vector graphics are often embedded as inline svg elements or linked as standalone svg image files. Beautiful Soup's find and findAll won't catch these on their own. This is usually not a big deal, since you can add one small adjustment alongside parse_image_urls():
import re

def parse_css_background_images(soup):
    urls = []
    for tag in soup.find_all(style=re.compile("background-image")):
        match = re.search(r'background-image:\s*url\(["\']?(.*?)["\']?\)', tag["style"])
        if match:
            urls.append(match.group(1))
    return urls
Feed its output into get_and_save_image_to_file() like any other URL. However, embedded inline svg elements aren't URLs but rather markup. Since Pillow doesn't support the SVG format, save them with str(tag):
inline_svgs = soup.find_all("svg")
for i, tag in enumerate(inline_svgs):
    Path(f"/path/to/test/inline_{i}.svg").write_text(str(tag), encoding="utf-8")
On the other hand, linked .svg files can be downloaded the same way as a PNG or JPG through requests, so check your web sources carefully.
Conclusion: building your python image scraper
By using the code outlined above, you should now be able to complete basic image web scraping tasks, such as downloading all images from a website in one go. Upgrading an image scraper can be done in a variety of ways, most of which we outlined in the previous installment. We recommend studying our Python Requests article to get up to speed with the library used in this tutorial and checking out how to download files from URLs with Python. In addition, check out our blog for more details on how to get started with data acquisition.
A pre-built scraper can drastically enhance your operations, so don’t miss out on a free trial of our eBay Scraper API and see whether it meets your data needs firsthand. In case eBay isn’t your primary focus, we offer alternative solutions like our general-purpose web scraper, which is also available with a free trial.
Frequently Asked Questions
Is it legal to scrape images from a website?
The legality of web scraping is a much-debated topic among everyone who works in the data-gathering field. It’s important to note that web scraping may be legal in cases where it’s done without breaching any laws regarding the source targets or data itself. That being said, we advise you to seek legal consultation before engaging in scraping activities of any kind.
We’ve explored the legality of web scraping in this blog post, so feel free to check it out for a more in-depth explanation.
How do I scrape images from website using Python?
Can I download all images from a website automatically?
Is there a free way to scrape images from a website?
Forget about complex web scraping processes
Choose Oxylabs' advanced web intelligence collection solutions to gather real-time public data hassle-free.
About the author

Adomas Sulcas
Former PR Team Lead
Adomas Sulcas was a PR Team Lead at Oxylabs. Having grown up in a tech-minded household, he quickly developed an interest in everything IT and Internet related. When he is not nerding out online or immersed in reading, you will find him on an adventure or coming up with wicked business ideas.
All information on Oxylabs Blog is provided on an "as is" basis and for informational purposes only. We make no representation and disclaim all liability with respect to your use of any information contained on Oxylabs Blog or any third-party websites that may be linked therein. Before engaging in scraping activities of any kind you should consult your legal advisors and carefully read the particular website's terms of service or receive a scraping license.
Related articles

Cheerio vs. Puppeteer: Which Should You Use for Web Scraping?

Shinthiya Nowsain Promi
2026-06-23


List Crawling in Python: Tools, Tips, and Techniques

Danielė Virinaitė
2026-06-17

Get the latest news from data gathering world
Scale up your business with Oxylabs®
Proxies
Advanced proxy solutions
Data Collection
Datasets
Resources
Innovation hub
Forget about complex web scraping processes
Choose Oxylabs' advanced web intelligence collection solutions to gather real-time public data hassle-free.